
So this tutorial is only going to be of use for a small minority of sewers. However, like my maternity top pattern tutorial, you may wish to bookmark it for the future! ;-) Over the last seven months I've found that attempting to dress in a stylish and comfortable way for breastfeeding/nursing can be a total pain in the arse/impossible. This is especially true if, like me, you prefer to make your own clothing rather than buy mass manufactured garments. Here's a way to adapt your favourite jersey top pattern, for example the Tilly and the Button's Coco which I've used here, for breast feeding functionality.

The basic concept of this pattern hack is to create an elasticated overlap of fabric at the boob area. In this top (or dress if you're making that version) you can discreetly 'gain access' without needing to lift up your whole garment, yank your neckline down or fiddle with any buttons or zips. You remain well covered which is a major bonus if, like me, you feel the cold or you don't enjoy exposing lots of flesh. Plus you also don't need to wear a vest layer underneath either, which I've been concerned about now we are approaching warm weather. This is an awesome answer to those two climate conundrums!

My modesty prevents me from modelling it's full function so here's my dress form instead to give you a proper idea!:

Pattern prep:
A note about sizing: This pattern hack works on close fitting garments, so you may want to consider sewing a size smaller than you otherwise would, or take in the side seams a bit half way through your make. If you are in between sizes on the Coco pattern, definitely go for the smaller one.
Step 1:
Trace the front pattern piece for whichever Coco view you are planning to make, transferring the notches and any useful markings from the original pattern.

Step 2:
Cut the front pattern piece out and hold it up to your body in front of a mirror (sorry you'll have to imagine this bit in your head as doing it plus taking a photo at the same time proved impossible!). You will need to make two small marks on your pattern in pencil:
1) the top of your breast, roughly where the top edge of your bra cup sits (don't worry, this doesn't have to be super accurate, this line will be hidden).
2) your 'empire line', about 3/4 down your breast (more flattering than a line that hits right underneath your breast).

Step 3:
Draw lines through your marks that extend across the front pattern piece. The lines need to be at right angles to the centre front.

Step 4:
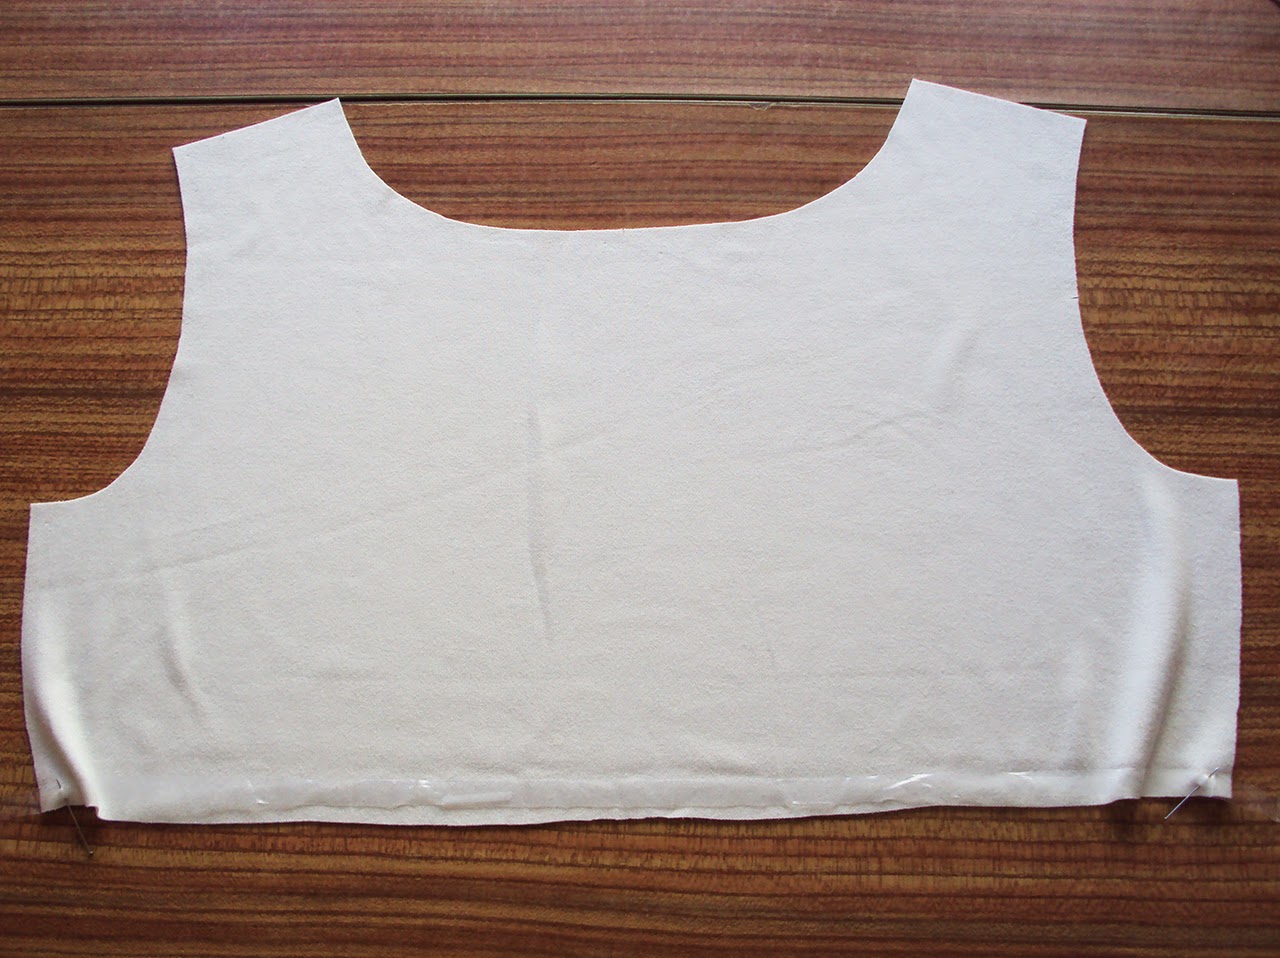
Make two new pattern pieces by tracing round your front pattern piece:
1) For the first, trace round the top part of the front pattern piece to the lower of the two lines you just drew. Add 1cm (3/8") seam allowance below the lower line. Cut the piece out. This is the new pattern piece is the upper front pattern piece and is pictured on the left below.
2) For the second, trace round the bottom part of the front pattern piece to the upper of the two lines you just drew. Add 1cm (3/8") seam allowance above the upper line. Cut the piece out. This is the new pattern piece is the lower front pattern piece and is pictured on the right below.

Step 5:
Add a notch on each of your new pattern pieces at the side seams where the other piece finishes (minus the seam allowance you added). These notches will help with the construction of the garment. You should be just be able to see them in the picture below to see what I mean:

Now cut out your pattern pieces in fabric as you usually would, replacing the original front pattern piece with your new upper and lower front pattern pieces.
Applying the elastic to the fabric pieces:
This stage should be completed after cutting the fabric pattern pieces out but before garment construction ensues.
Step 6:
Lay the fabric upper front piece wrong side up on a table. Leaving extra clear elastic over the edge of the side seam, pin one end of elastic to the bottom edge of the pattern piece (pictured below). Being careful not to stretch the elastic NOR allow it to be too loose, lay the elastic along the bottom edge and pin in place at the other end, once again leaving extra clear elastic over the edge of the side seam.

Step 7:
Marking with a pin, pen or whatever method you prefer, make the elastic 1cm (3/8") shorter and re-pin to the lower edge. As you can see in the picture below, the elastic will now not quite lie flat against the fabric.
Step 8:
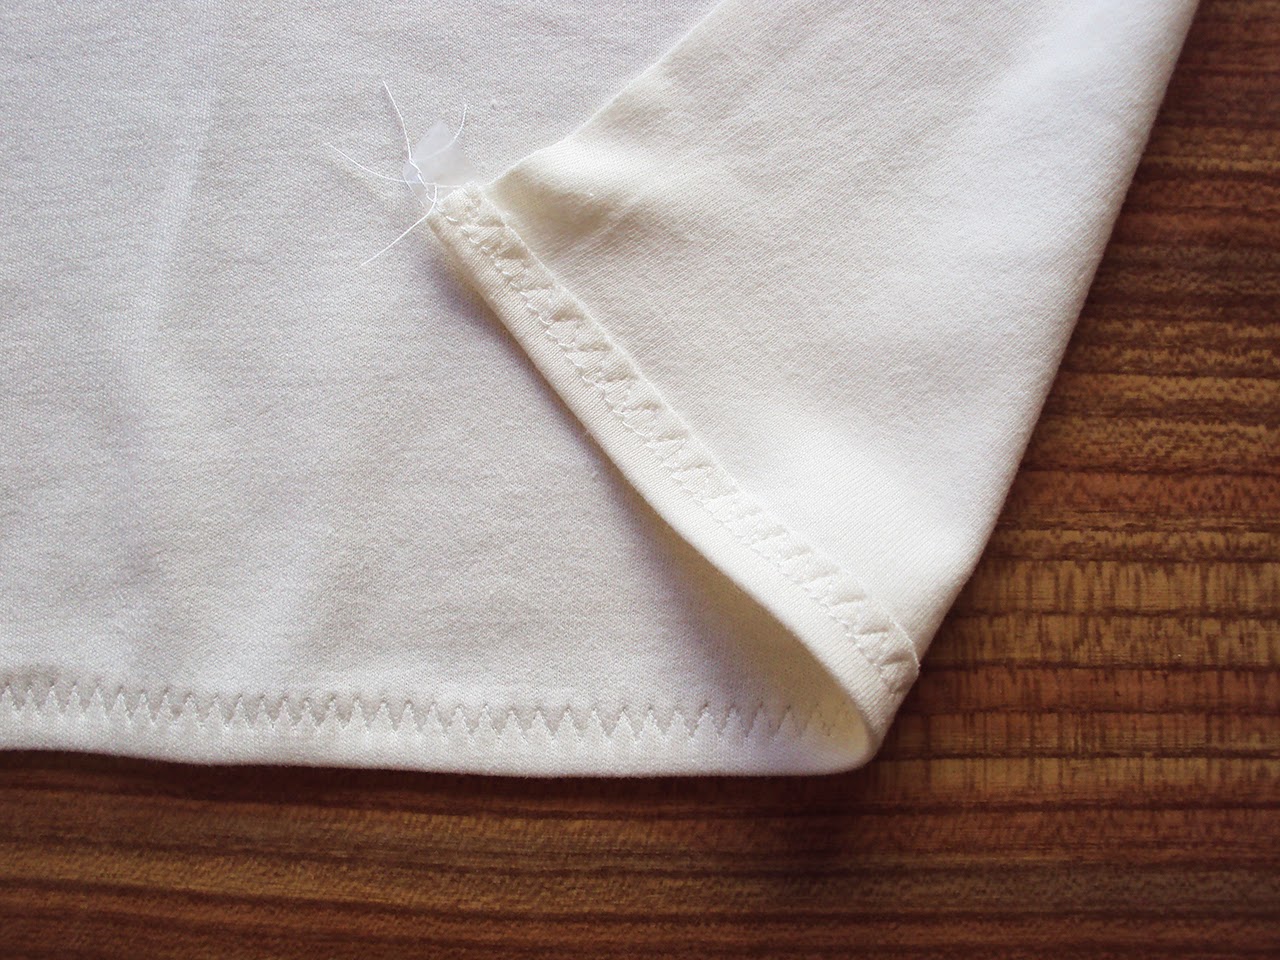
Slightly pulling the elastic as you go so no pleats or tucks appear, baste the elastic along the bottom edge of the upper front piece by stitching down the centre of the clear elastic with a straight stitch. Then fold the 1cm (3/8") seam allowance up, encasing the elastic, and stitch using your preferred stretch stitch (I've used a three-step zigzag here).
Step 9:
Repeat Steps 6, 7 and 8 to apply elastic to the top edge of the lower front piece, HOWEVER make the elastic 2cms shorter in length than the top edge (unlike the 1cm you shortened the elastic on the upper front piece). The elastic applied to these edges prevents them from gapping as long as the overall top is a snug fit. The elastic on the upper front edge isn't quite as tight as the elastic on the lower front piece because a gathered effect on the upper front piece is less desirable as it would be more visible.
Garment Construction:
Now you can continue the construction of your garment as per the pattern instructions using the upper front piece instead of the old front piece to complete the shoulder seams, neckline/collar finishing and sleeve head insertion.

Step 10:
When you are ready to stitch your sleeve seams and side seams (usually done in the same process), you need to bring your lower front piece to the party. Lay the lower front piece face down on top of the upper front piece so they create an overlap. This is where those little notches to made in the side seams really help you to align the pieces correctly.

With the sleeve and side seams stitched, now would be a really good time to pop the garment on and see how it's fitting. As I've said before, the overlap will only function well and look nice and gape-free if the fit of the garment is quite snug. If it looks like it might be gaping, pinch in the side seams to see how much extra needs to be removed from the side seams. Withe the fit perfected, you can finish the construction of your garment.
Now you're ready for a hungry baby!


28 comments:
This is great! Although I had to wean my baby earlier this year, I can certainly express (haha?) my appreciation for a tutorial like this. I wish there were more patterns that were nursing-friendly!
That's a great idea...although with three teenage children, I hope never to be feeding another baby!
I've never needed a nursing top as I'm brazen and just lift my top. I have, however, just made myself a dress which I shan't be wearing until my breast feeding days are over.
Cool, I've been looking for such a tutorial for a long time. Thanks for this fabulous end of searching!
Brilliant, thanks and very timely for me as my wee one is 3 weeks.
so cute! I did love that your dress form was able to step in for you xx
Perfect top, great instructions.I'm all for showing how a pattern can be modified to suit the wearer.
That's excellent, really useful info and I shall be using this hack later on this year!!
This is awesome. Thanks for sharing!
This is such a brilliant pattern hack. I wore tops similar to this by a company called Boob (subtle, right?). They were pricey though, so if I ever need to nurse again, I would definitely do this.
Great idea! I'm too old to have a baby, but still I admire your creativity.
That is one adorable baby. She's always smiling! She reminds me, with her round little head, of my own baby at the same age. (Now that baby is 14!) We said she looked like a light-bulb when she smiled (what with the round head shape).
Great idea! I will definitely come back to this should I need it in the future! Thank you!
Not pregnant nor breastfeeding, but this is genius :)
I think the stork had lost the path to my door but I can still are this is very clever. Great stuff! Rachel ☺
Fantastic! And bookmarked for the future :-D
Awesome! I love this idea, been trying to get my sister into sewing and she's got a little one so its perfect for her!
Very clever concept! Your every post with Dolores makes my day. What a charmer! She looks so happy it's catching.
This is great! I fussed so much about having "nursing-friendly" clothes during the early months of my girl's life, but I eventually just got to a system of wearing a stretchy camisole/tank top underneath whatever else I was wearing. Then I would pull up the top shirt, pull down the tank top, and nurse that way. It was discreet and make dressing easy, as I could then wear pretty much any top as long as it was pull-up-able!
great idea, wish i'd had something as stylish as this. I just wore faux wrap dresses (litterally lived in them) and yanked them to the side! Not very discreet.
This is great love! I think I'll make one for my lovely brother's lady who is the newest breast feeder I know. Genius well done you and also your hungry baby is getting a virtual squish from me.
Love Re
xxx
Lovely!! And I love that it's a generic pattern hack for breastfeeding rather than being specific to a particular pattern (so much more perfectly versatile!) - Thank You on behalf of all the mums I'll send over here ;)
Hi,
Great tutorial!
Any advice for a similar conversion to an existing dress? I was thinking of cutting under the chest line and adding an internal piece in a matching color.
Thanks!
I just saved this to my favorites, under the heading of: sewing for baby. Since it really is for the baby and because I'll see it every time I go to sew for a baby! Thank you, although it has been a long time since I've nursed, I remember how hard it was to find a modest top.
Do you think this would work for a pre-made shirt?
This is brill! Just doing the alteration now and it’s working! Never attempted sewing a breastfeeding top but this works perfectly. Jsut wish I was using a medium weight fabric as the light weight jersey stretch is proving difficult to manipulate. It’ll look good in the end. Just finishing touches to do. And yes I agree the mid line between top of boob and middle of boob works very well, much better than an under boob design. Thanks for sharing. Hoping the next top isn’t. Going to take as long, and yes, it’s a medium weight, thankfully.
Thank you for this awesome tutorial! I have some questions that I was hoping you could clear up. In step #7 the instruction says to shorten the elastic by 1 cm, can you clarify this please? Does this mean from the overall length? In step #6 you say to leave extra elastic over the edge of the side seam, could you please quantify this? I can't tell from the step 7 photo if the now shortened elastic still has overhang? Will you please explain why the elastic now no longer quite lies flat against the fabric?
Thank you!
Thanks for this tutorial. It was exactly what I was looking for. I have a few ready-to-wear nursing tops that I bought and love and wanted to figure out how to recreate them in my favourite patterns. Thanks!
Post a Comment